Do you know Microsoft Excel has a real time camera that can capture your data image?
Am I kidding with you? Surly not!
Yes, I am talking about the new Camera tool of Microsoft Excel. This tool can take snapshot of your selected data. But how it works? Let’s dig down.
What is Camera Tool?
Camera tool is a new tool of Microsoft Excel. It allows you to show visual reference of your data Normally this tool is not visible in ribbon bar. But from option menu you can easily add the command in any tab of the ribbon. Let’s see, how to add the Camera tool.
Go to File tab, then click on option, this will show you Excel Options dialog box. Then click on Customize Ribbon. See the following picture as reference:
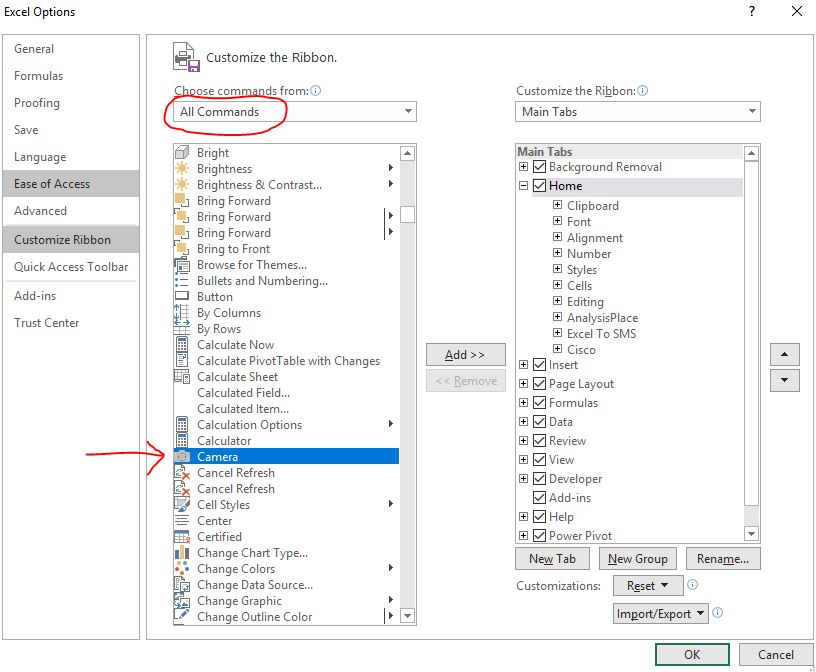
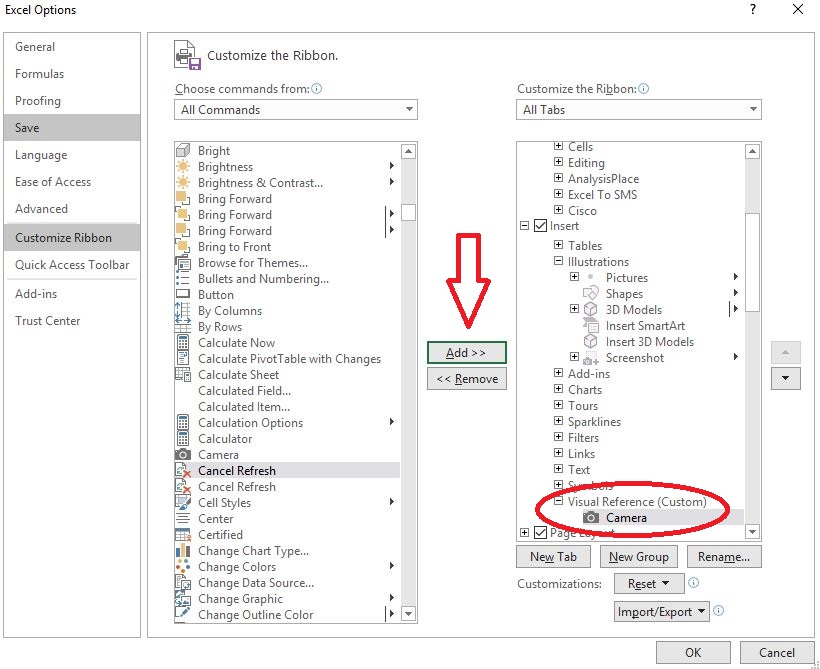
Then select All commands from Choose command from. After that, select Camera by scrolling down in the below list. Now add the tool in any tab you want. I create a new custom group named Visual Reference in Insert Tab. Then click on add button. Yes! You have been successfully added the Camera tool! See the image below:
How to work with camera tool?
- At first select any data which you want to show as a snapshot.
- Then click on camera tool
- Click any where in the blank area of your worksheet. Amazingly you will see the image of the selected data
Following image show the main data and the visual data of main data (right bordered image)

So, what are the facilities by creating image using Camera Tool?
There are many advantages of using Camera tools of excel. They are:
- You can use camera tool captured image across many worksheets in your workbook. So, it is to capture important presentable data in one place.
- Captured image is real-time updatable. If you work on real data the image data will automatically update the change made in real data. Wow!
- You can easily navigate by double clicking in image data for quickly move to real data.